Many of us assume that paining nails or going for a manicure only became popular in the early 1900’s but this is not strictly true. Ancient Roman women adopted the trend of painting their nails into the cosmetic and toilette routines after discovering it from the ancient Chinese.
It became very popular in ancient Rome to go to the barber for your haircut just as it is today. However, barbers in ancient Rome were seen as a real luxury because they were trained in many beautifying procedures; one being the cutting and shaping of finger nails. So they were very similar to our modern day beauty salons where you can get both your hair cut and a manicure.
However, if a Roman women was poorer and could not afford to go to the barber to have her nails shaped she could easily do it at home like many women do today. Roman women carried with them chatelaines which were decorative belt hooks or clasps that could have small tools hung from them, such as a nail cleaner and nail file. Ancient Roman women probably went for medium length nails with rounded tips, as this shape is easiest to maintain and grow out and also makes it easier to pick things up without breaking a nail. In mosaics and statues from ancient Rome we can see women were depicted with this style of nail.

We know that most women in ancient Rome had access to rich moisturising face creams that contained ingredients to help with spots, wrinkles and other blemishes. There’s no reason not to suspect that they also used some on their hands as women have always known that it is the face, décolletage and hands that sow the first signs of age. Chances are women used their moisturising creams for both their face and hands, just as we do today.
It is believed that to colour their nails women in ancient Rome used henna or a dye called ‘lac’ which was extracted from an Indian insect and imported into Rome. These dyes would have had the benefit of being rather long-lasting so that women probably didn’t have to look after their nails on a regular basis.
Now, I shall show how you can get the Roman Manicure look at home.
The red nail look is a Classic and was very popular in the classic Hollywood ‘golden age’. This nail look would be lovely for a a day to day basis or to finish off a look for a themed party!
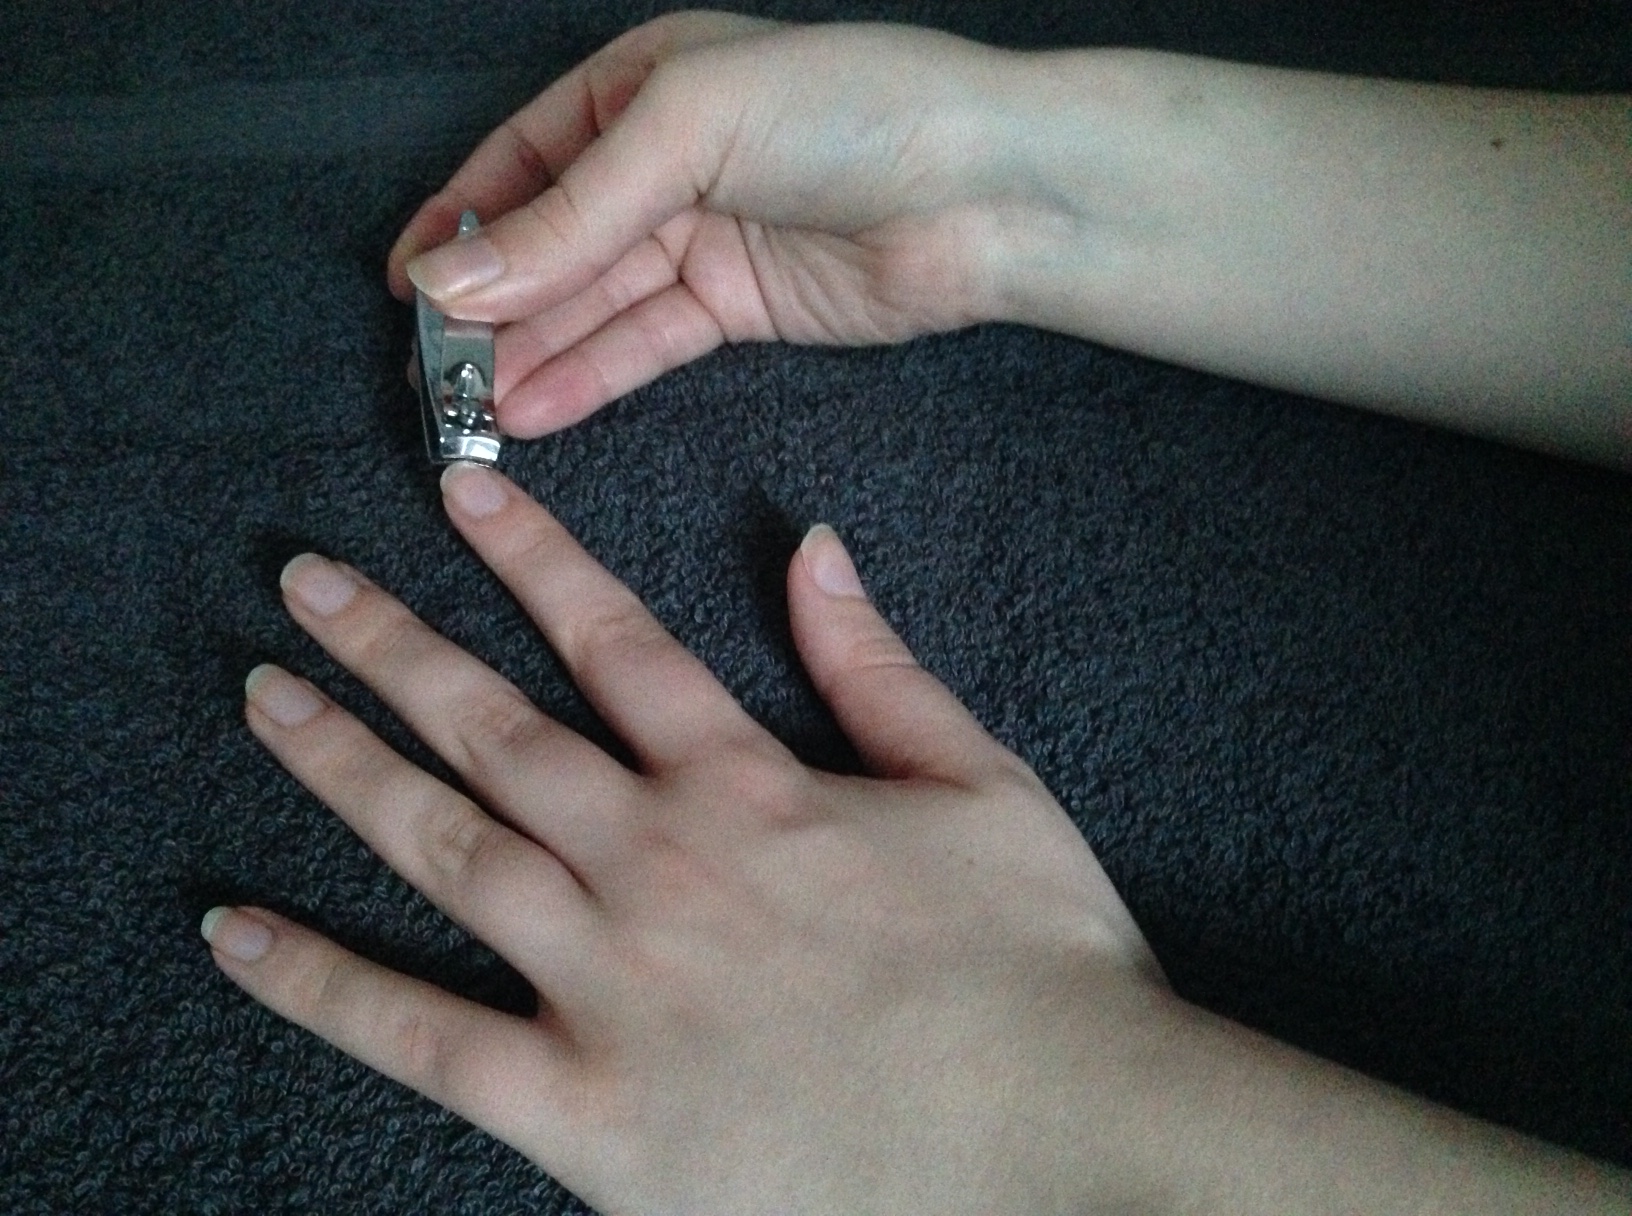
Cut nails
Firstly, you want to start by washing your hands in warm to hot water to cleanse the nails and skin. The hot water will also prepare your nails for cutting them. Tip: It’s much easier to cut your nails straight after a bath or shower because the water opens up your cuticles and allows the nail to lengthen to its full length and also softens the nail so that it is easier to cut and shape! Next you want to cut your nails. You may wish to choose a shape that suits your hands but to get the Roman look cut them to a medium-short length.
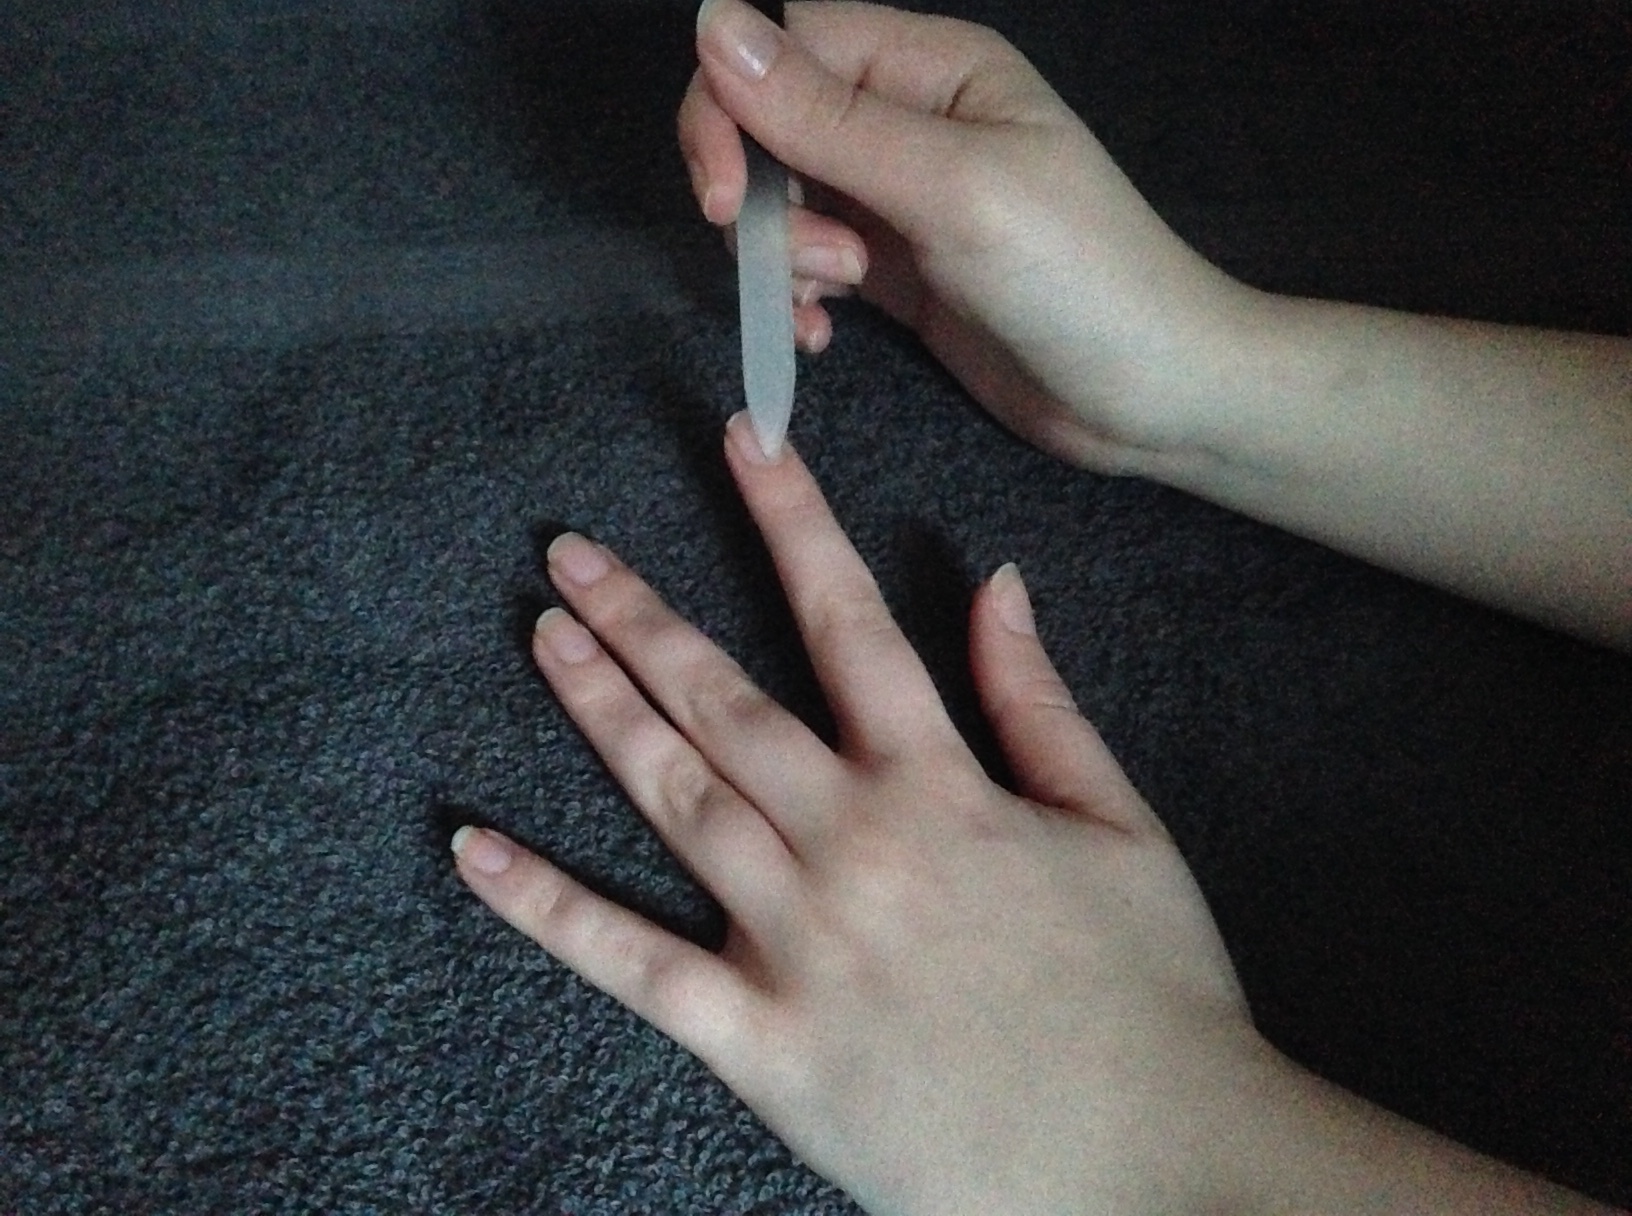
File nails
Next, you want to file your nails. Again you may want to chose the shape that suits you but for the Roman look file down the sides and tip so that they appear slightly rounded.

Cuticle oil
Now, you want to focus on caring for the skin around your nail so that it is not damaged by the chemicals in nail varnish and nail varnish remover. Begin by using an oil on the skin around the nails, concentrating on the cuticles. Massage a small amount of the oil into your cuticles and nail bed. I used Bio Oil because its great for getting moisture into the skin.


Remove cuticles
To create a perfect circular shape on your nails, push back your cuticles and gently remove them.
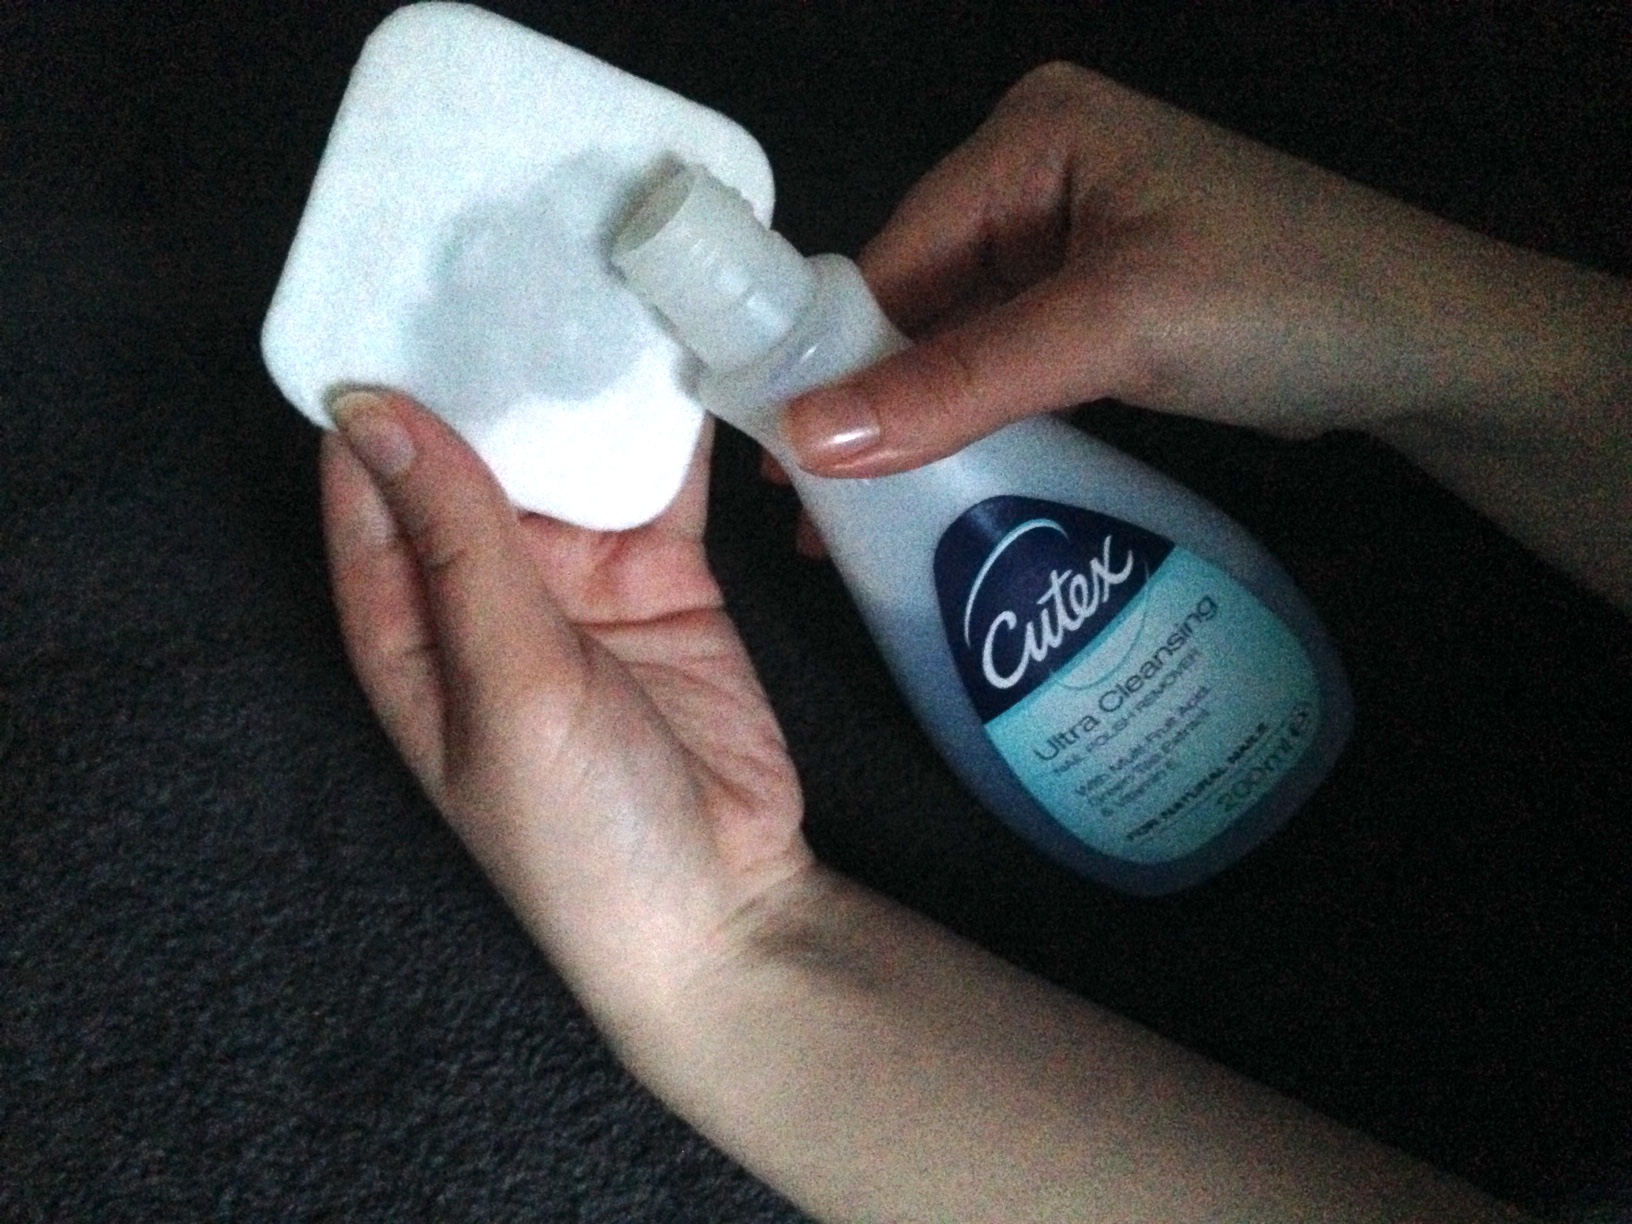
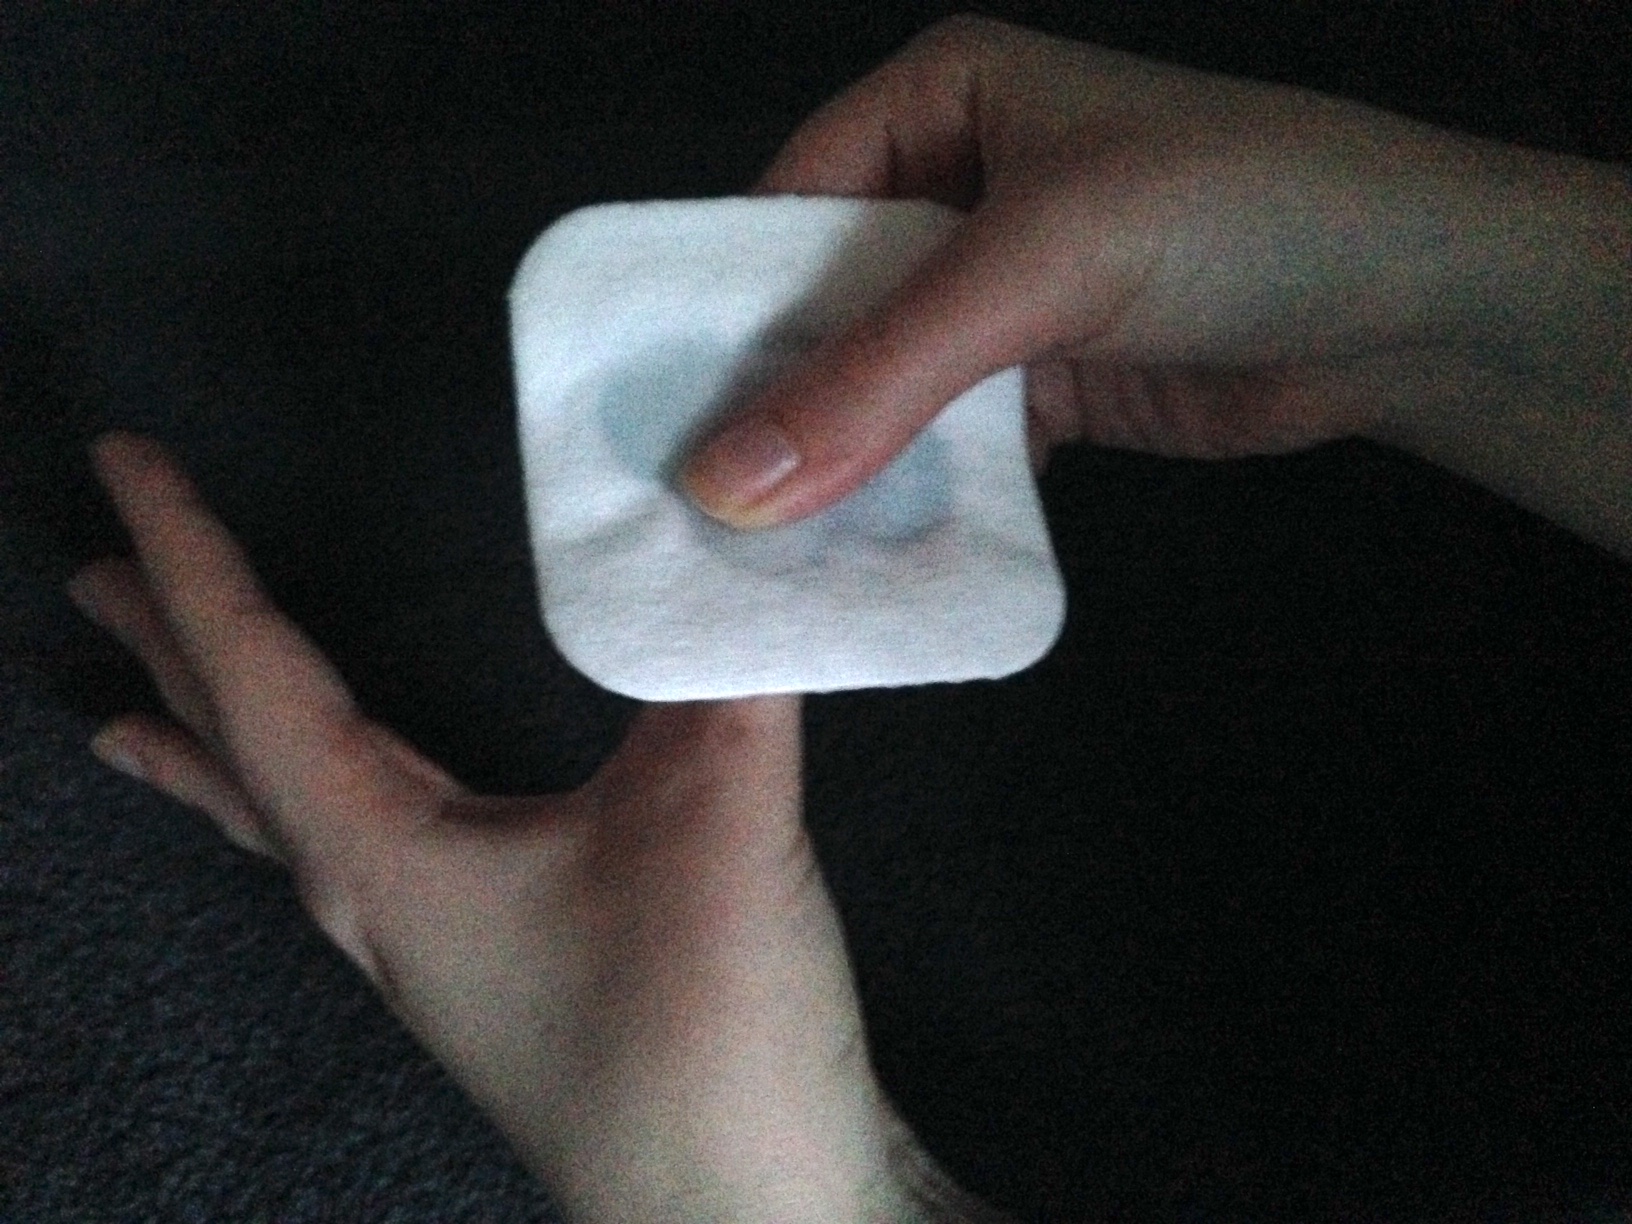
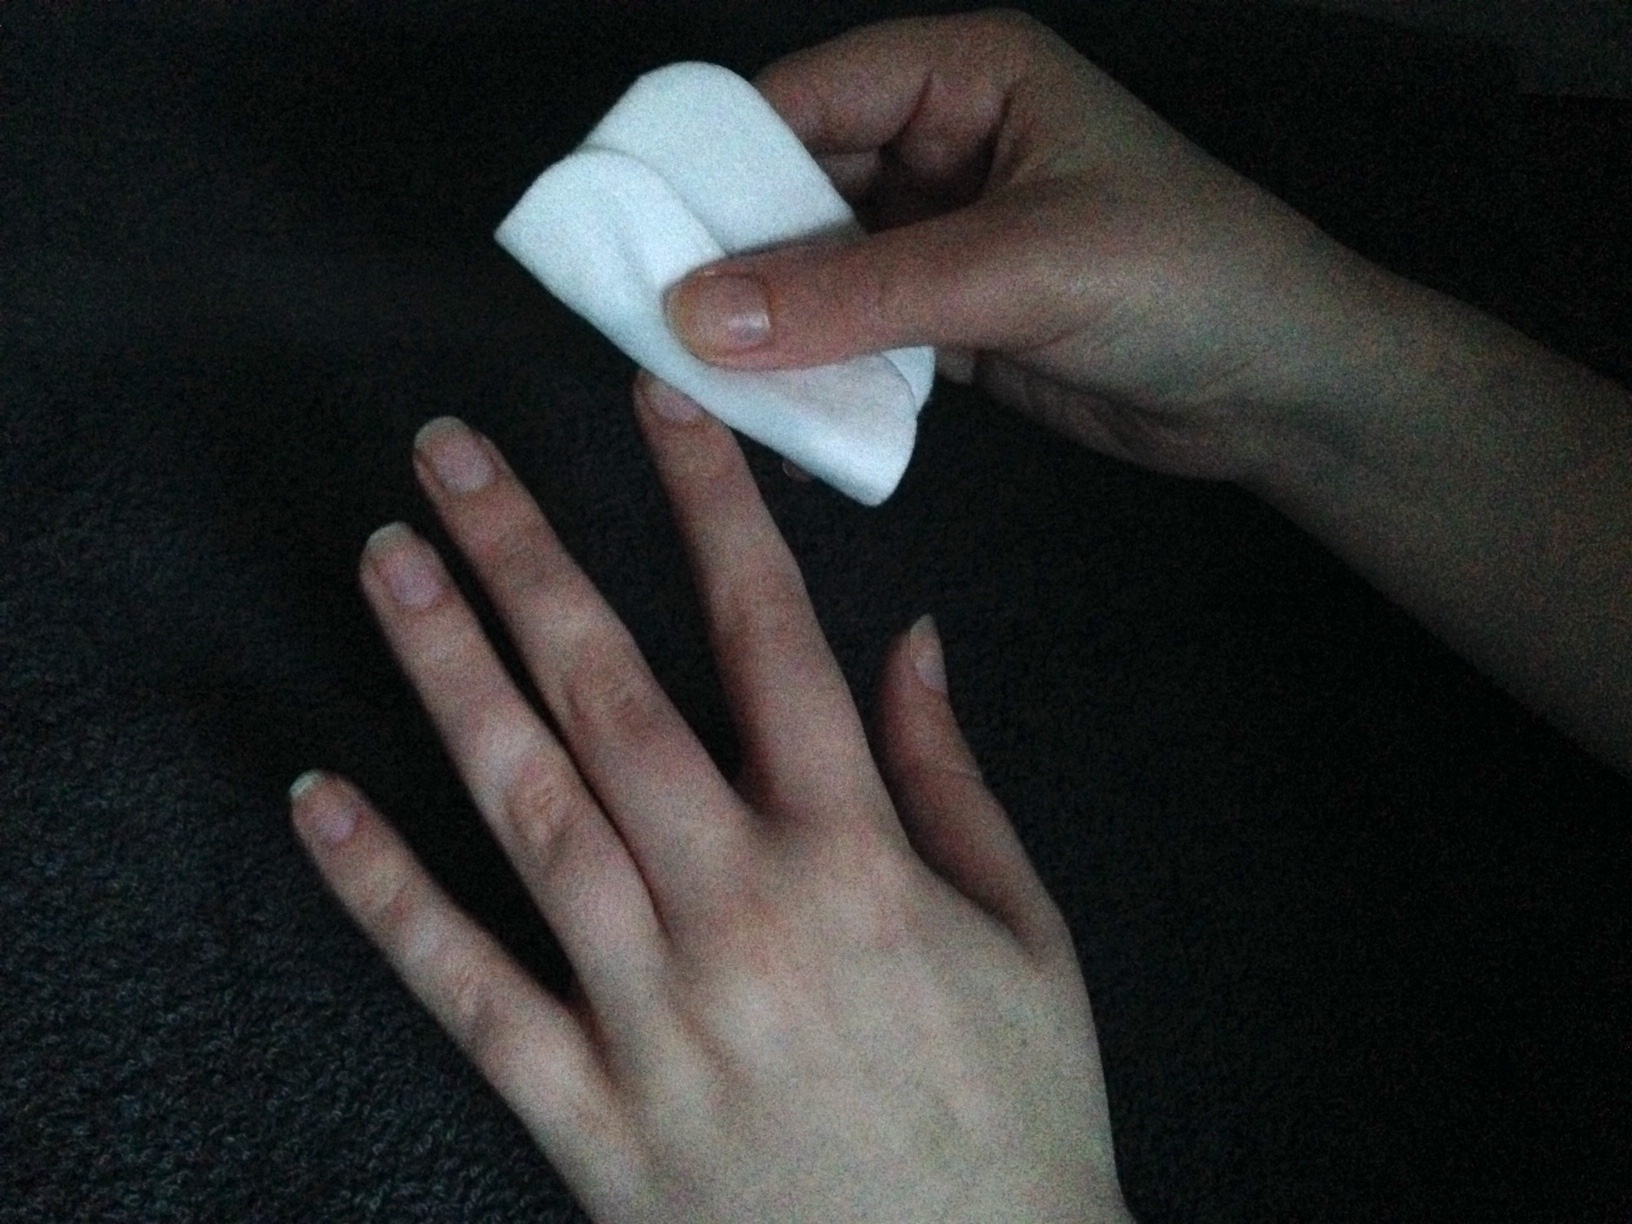
Run over a nail polish remover for a clean surface
To clean up around your nails before you begin applying polish run a cotton pad with some nail varnish remover over your nails and finger tips. This will make sure that the surface is free of oil and fully cleansed so that your polish will go on smoothly. I used Cutex Ultra Cleansing Nail Polish Remover.
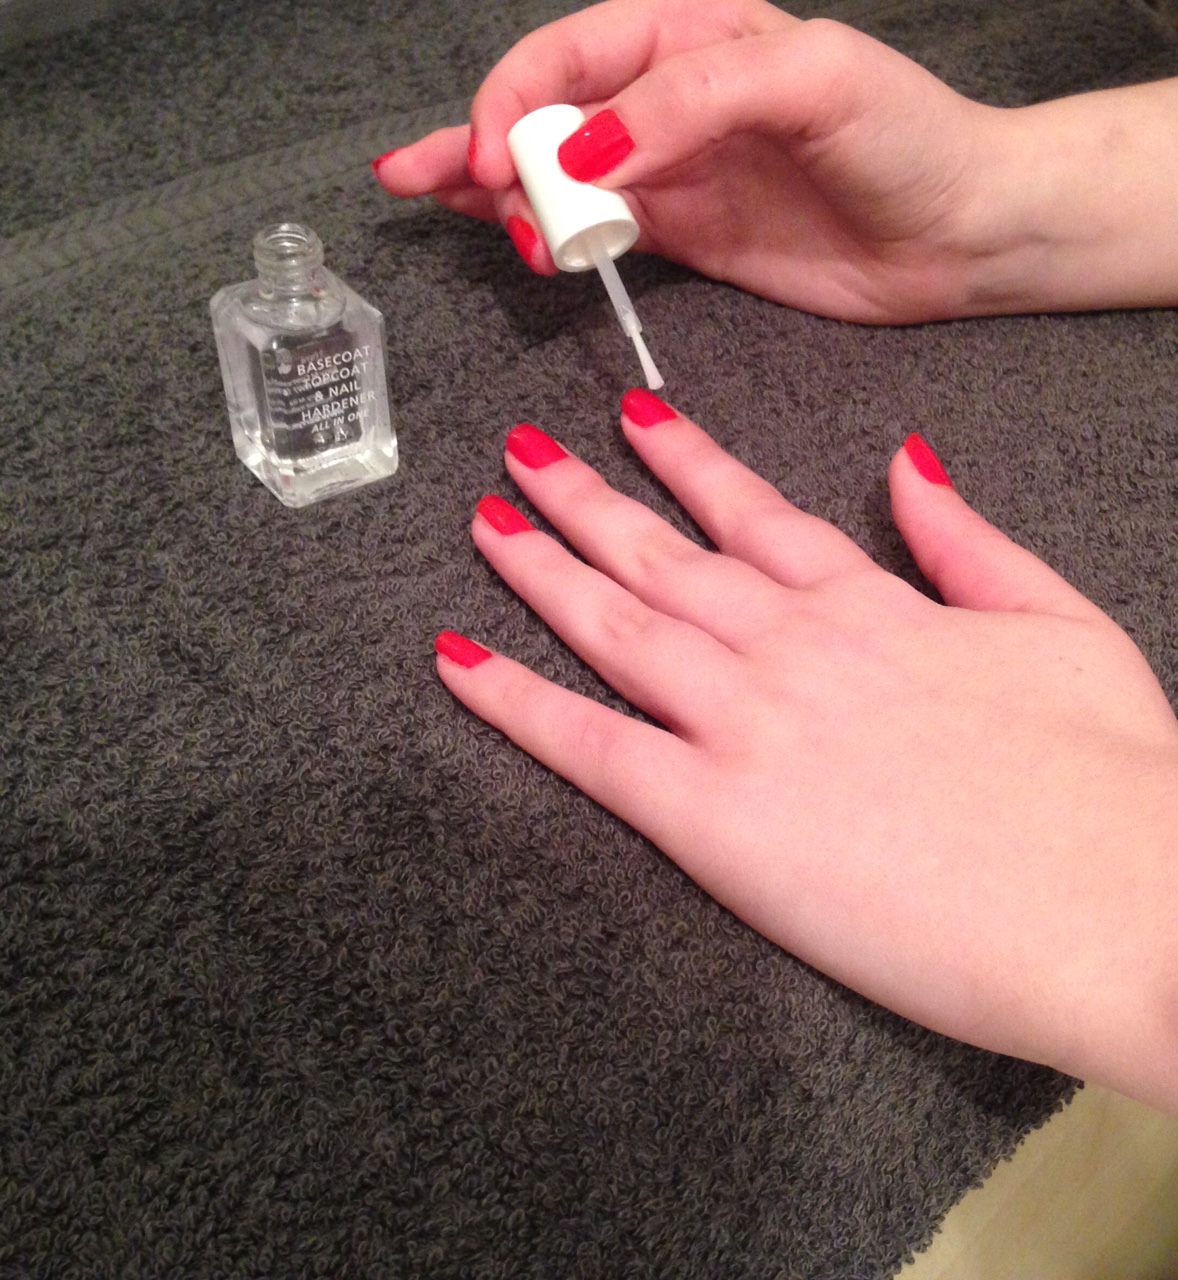
Base Coat
To start the process of painting your nails you will need to start by adding a base coat. A base coat will ensure that the colour of the polish does not stain your nails when you wish to remove the polish. I used Barry M All In One Base Coat, Top Coat and Nail Hardener.


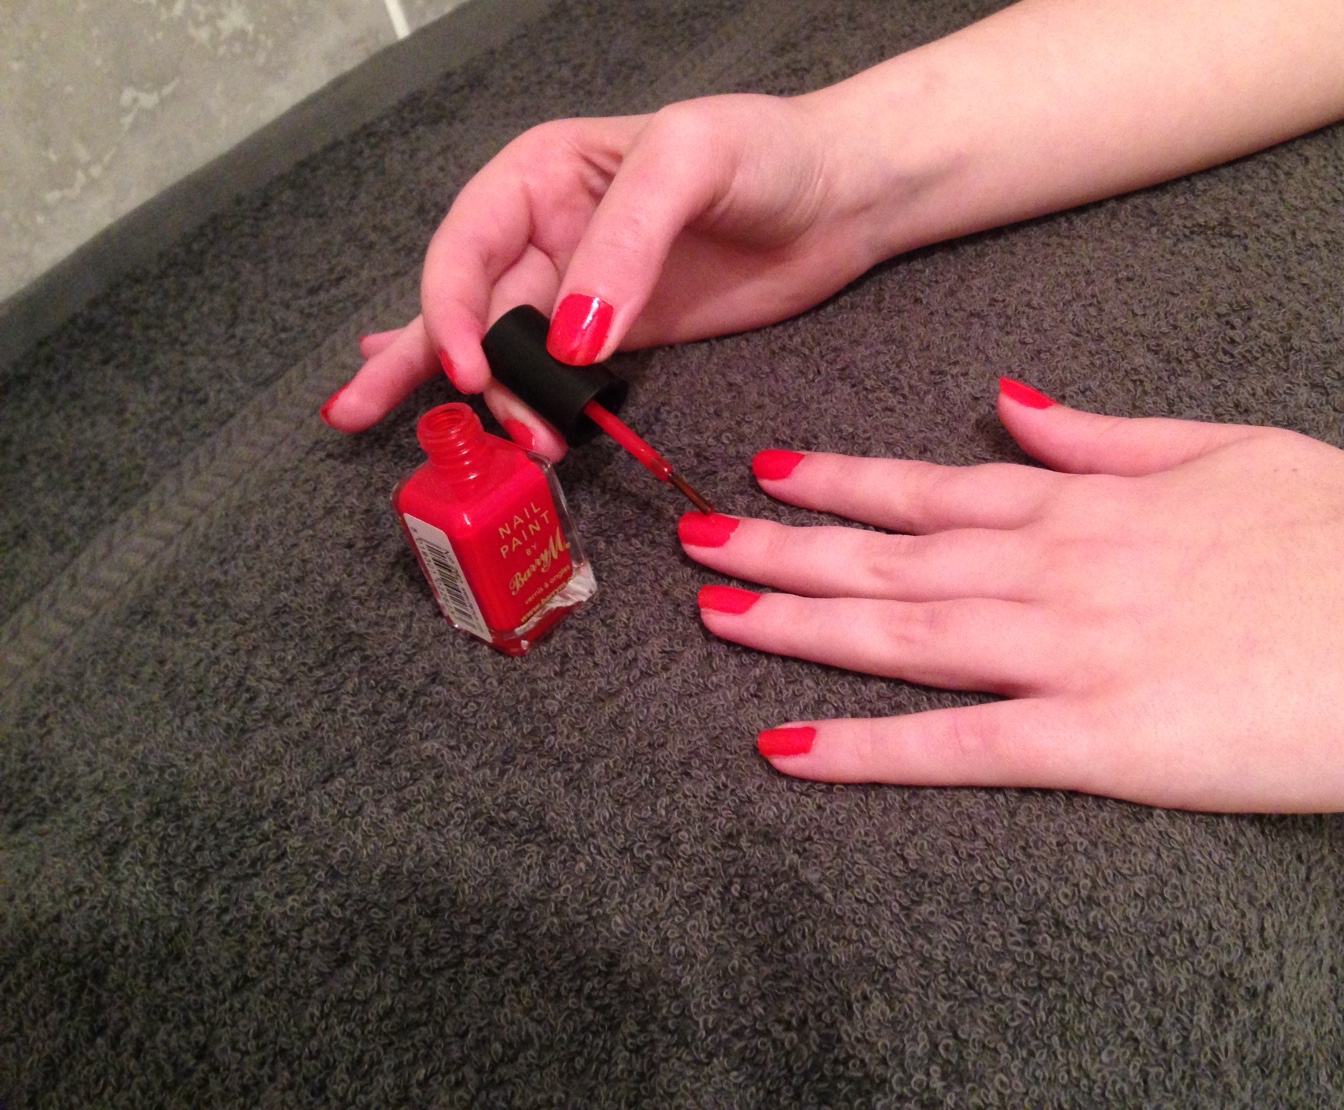
Nail Varnish Coat 1 and 2
Once the base coat has dried thoroughly, you can apply your first coat of nail varnish. For this look you will want to use a red nail varnish to get an authentic Roman appearance. Depending on the varnish you use, you may find you one need the one coat because the colour is opaque. Even if it is I would recommend adding a second layer anyway as it will deepen up the colour and will also make it more long lasting. Tip: Make sure your first layer of varnish has properly dried before adding a second layer or you may find you get small air bubbles or bumps in the polish as the second layer will pull up any of the first layer that is still wet! For this look I used Barry M Nail Pain in the shade Bright Red. Red is a great colour as it suits most skin tones, is fashionable both in winter and summer, and it’s a classic!

Top Coat
To finish off the painting of your nails, add a top coat once your second layer has finished drying. The top coat will make help to make your manicure last longer and should prevent chipping to the tips of your nails. It will also strengthen your nails and prevent breakage.
Moisturiser
To finish off your manicure once your top coat has finished drying, use your favourite hand cream and massage it into your finger nails, knuckles, palms, the backs of your hands and up your wrists and arms. Pick a hand cream for your skin type – whether you have dry skin or normal skin.
 Here is the finished Roman red manicure!

I hope you enjoyed this post and recreate this manicure at home! This manicure will be perfect for everyday and for evenings out and if you take all the steps it should last all week without a chip!
